
Evoriqa is live. Start free

Integrations

Works on the platform you already use

No migration, no developer. Add your AI support agent to any site that lets you paste a script tag, and it appears on every page.

One script tag · No migration · Configurable per site

Paste one snippet
<script
  src="https://app.evoriqa.com/widget.js"
  data-chatbot-id="YOUR_CHATBOT_ID"
  async
></script>

Your exact snippet (with your chatbot id) is in the dashboard Install tab.

Pick your platform

Step-by-step guide for your stack

Whatever you built your site with, there's a two-minute guide to get your AI agent live.

WordPress

Add the widget with a header-and-footer plugin or your theme, no FTP needed.

Footer scripts / before </body>Read the guide

WooCommerce

Answer pre-sale product questions and order lookups on your WordPress store.

WordPress footer scripts, store-wideRead the guide

Shopify

Drop one snippet into theme.liquid and answer pre-sale questions on every product page.

theme.liquid before </body>Read the guide

BigCommerce

Add the widget through Script Manager and pick exactly which storefront pages it loads on.

Script Manager → Footer, storefrontRead the guide

Wix

Paste it into Wix Custom Code and it loads site-wide in seconds.

Settings → Custom Code → BodyRead the guide

Squarespace

Use Code Injection to add live AI chat to every page at once.

Settings → Code Injection → FooterRead the guide

Webflow

Add the snippet to your project's custom code and publish.

Project Settings → Custom CodeRead the guide

Google Tag Manager

Ship the widget through a Custom HTML tag, no site edits required.

Custom HTML tag, all pagesRead the guide

Framer

Add it to your site's end-of-body custom code and you're live.

Site Settings → Custom CodeRead the guide

Ghost

Paste it into Code Injection's Site Footer and it runs on every post and page.

Settings → Code Injection → Site FooterRead the guide

GoHighLevel

Ship the agent to a client site through the body tracking code, under your own brand.

Site Settings → Body tracking codeRead the guide

Bubble

Add it once in SEO / metatags and every page of your Bubble app carries it.

Settings → SEO / metatags → bodyRead the guide

Custom HTML / JS

Hand-coded site or a framework? Paste one line before </body> on any stack.

Before the closing </body> tagRead the guide

Cal.com

Let the agent book straight into your Cal.com availability, inside the conversation.

Connected in your dashboardRead the guide

Calendly

Hand the agent your Calendly link and it books the slot without a hand-off.

Connected in your dashboardRead the guide

Don't see your platform? If you can paste a snippet before </body>, Evoriqa works. See the universal guide.

From sign-up to live chat in three steps

Step 1

Configure your agent

Train it on your site and docs from the dashboard, then brand it to match — the onboarding checklist walks you through it.

Step 2

Copy one snippet

Grab the embed from the Install tab. It already has your chatbot id filled in.

Step 3

Paste it anywhere

Drop it into your platform's footer or custom-code box. Live on every page.

The snippet is right in your dashboard

Every chatbot ships with a ready-to-paste embed, plus an inline search-bar variant if you'd rather build the AI into your page.

  • Works on any CMS, site builder, or JavaScript framework
  • Loads asynchronously, so it never blocks your page render
  • One agent shows up site-wide, on every page automatically
  • Prefer a search box? Use the inline search variant instead
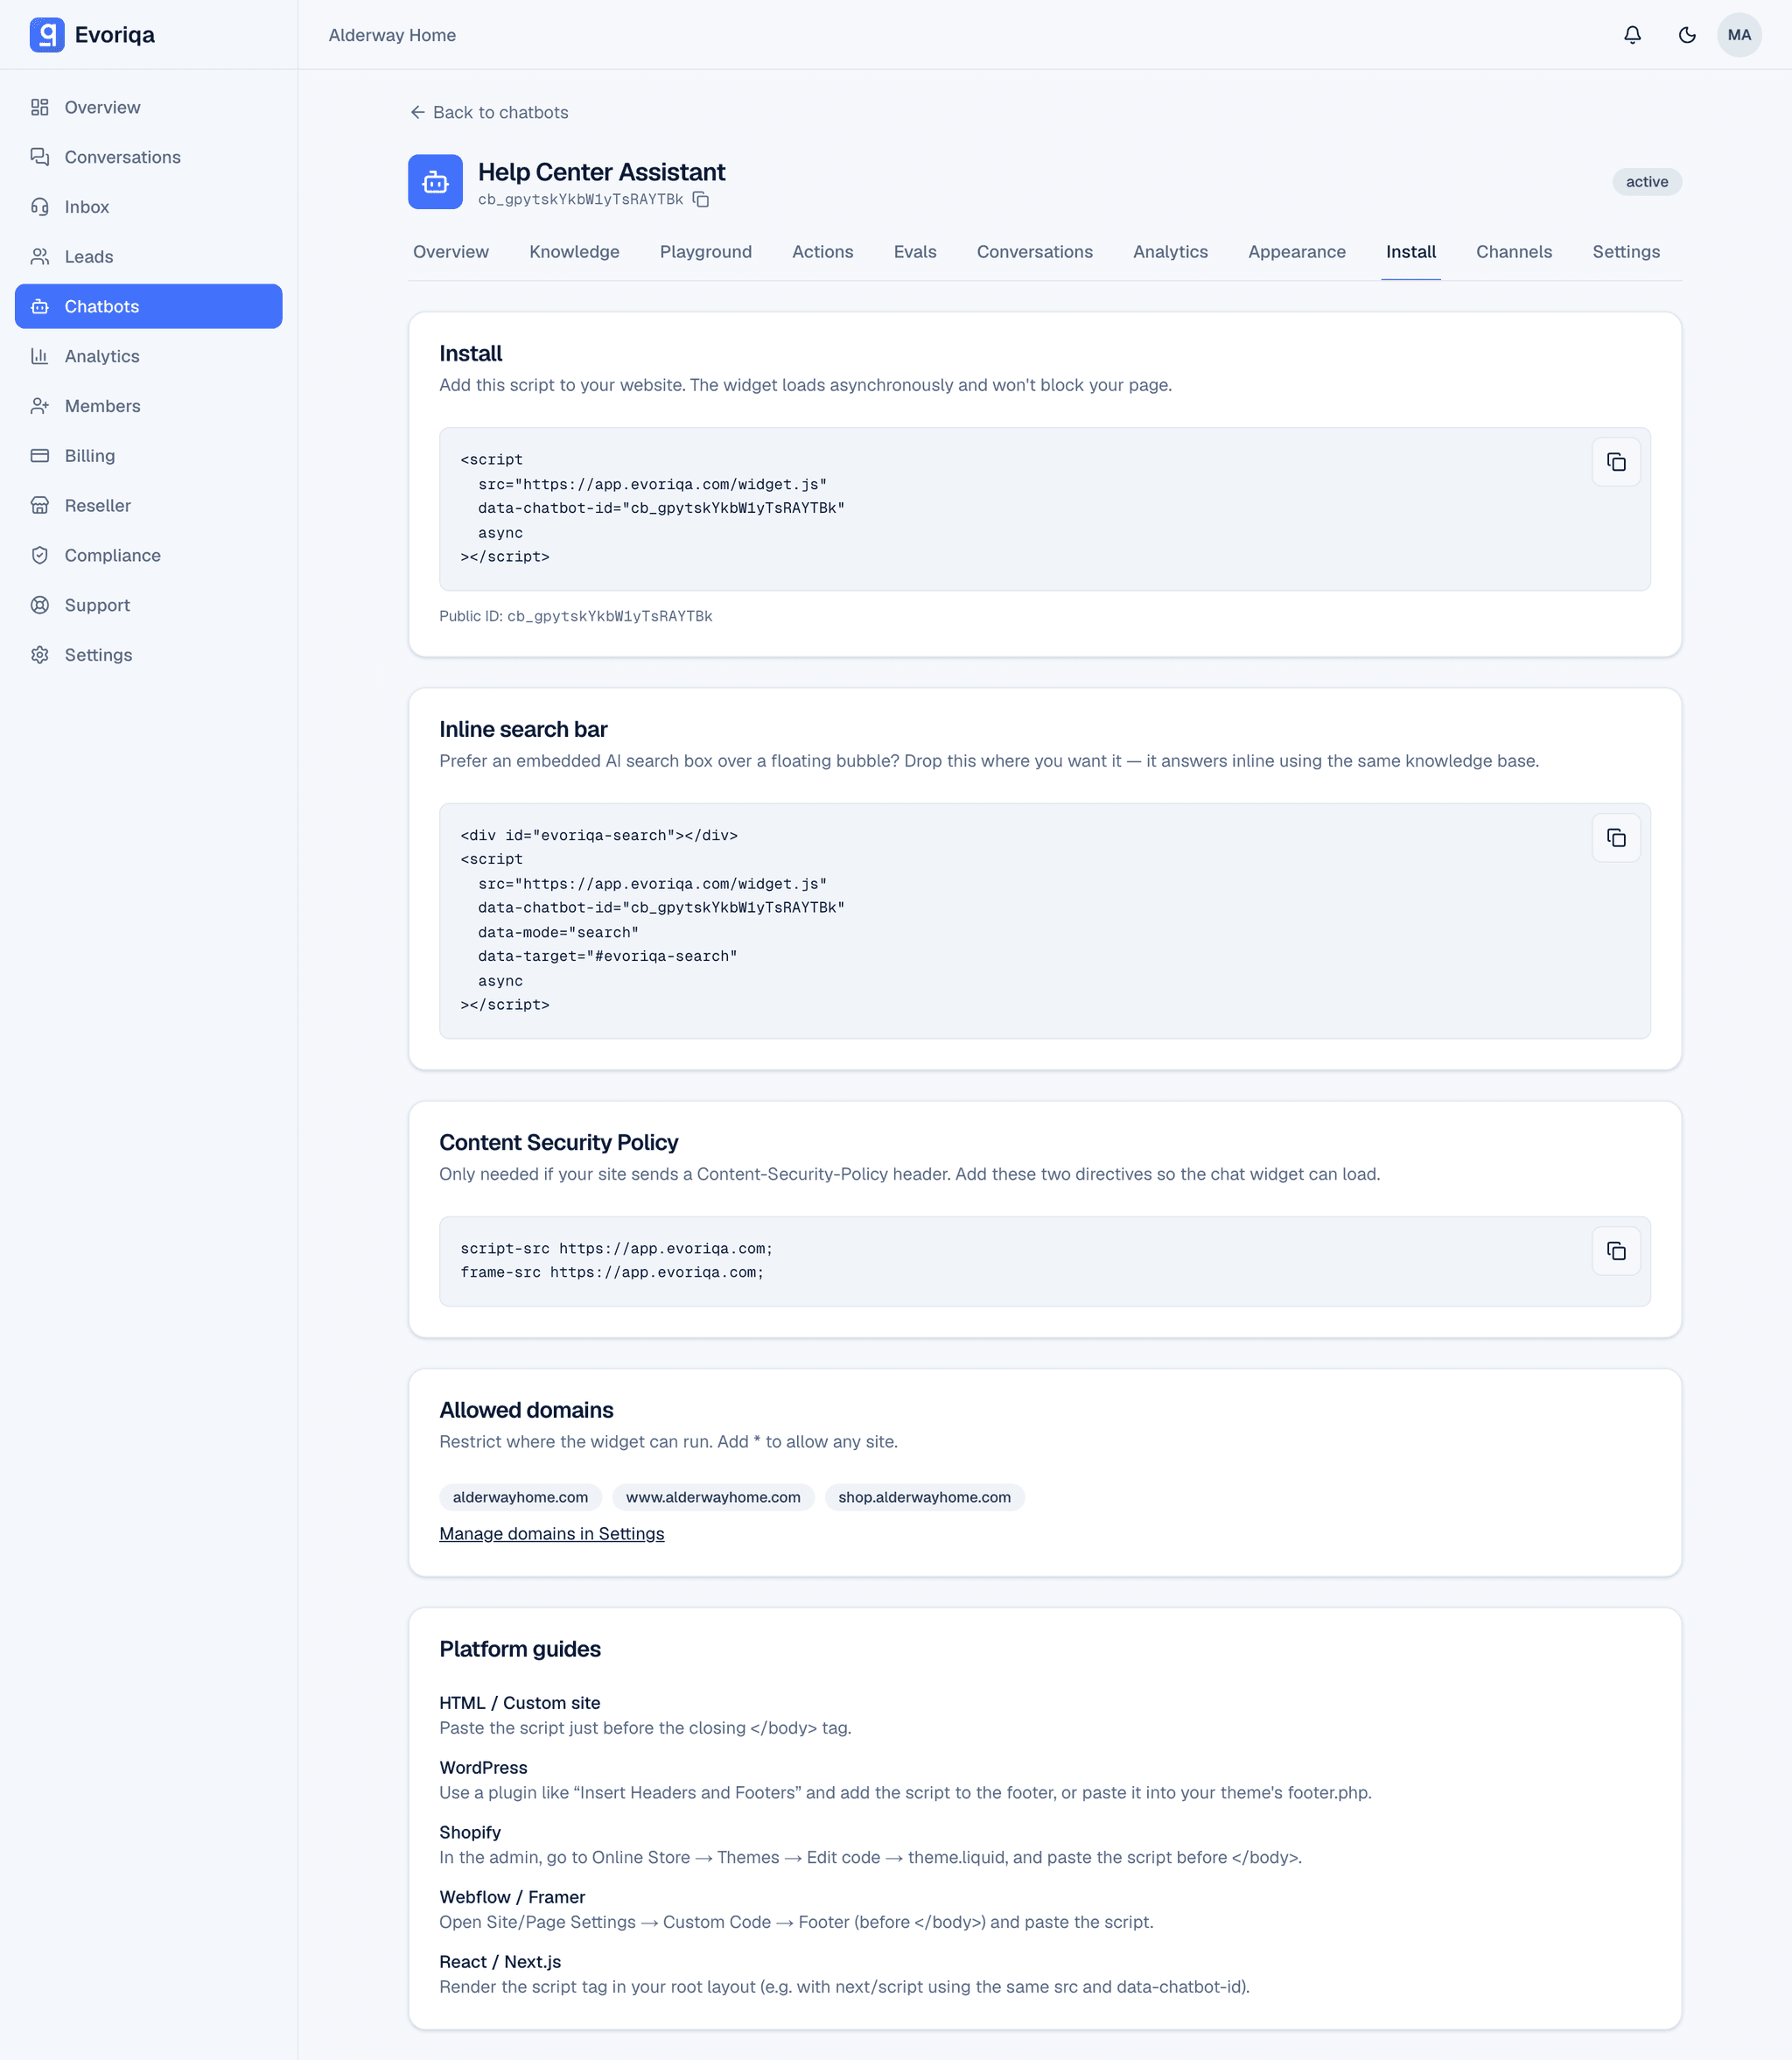
The Evoriqa Install tab showing the copy-paste embed snippet and inline search variant

See the install on your own site

Point Evoriqa at your website and help docs, and your agent starts answering questions, capturing leads and booking appointments across every channel. Free to start, no credit card.